▶️Staking / Bonding

Note : Minimum Bonding is 50K AVL for mainnet (will be decrease in the future). There's 2 side I will separate on this guide VPS and DASHBOARD

  • ON YOUR VPS

  1. Generate session keys

curl -H "Content-Type: application/json" -d '{"id":1, "jsonrpc":"2.0", "method": "author_rotateKeys", "params":[]}' http://localhost:9944
  1. Restart node

sudo systemctl restart availd.service

Note : Save your session keys it will needed to connect your dashboard with your node

  • ON YOUR DASHBOARD

  1. Navigate to the Avail network explorer at https://explorer.avail.so/(opens in a new tab) and choose the correct network.

  2. Create a stash account.

  3. Navigate to the Staking tab in the Explorer.

  4. Click on Stash to initiate the bonding process.

Tips : Don't BOND all your tokens because you need some gas fee (you can increase your bonding anytime soon)
  1. Fill in the bonding preferences. Then click Bond and Sign and Submit.

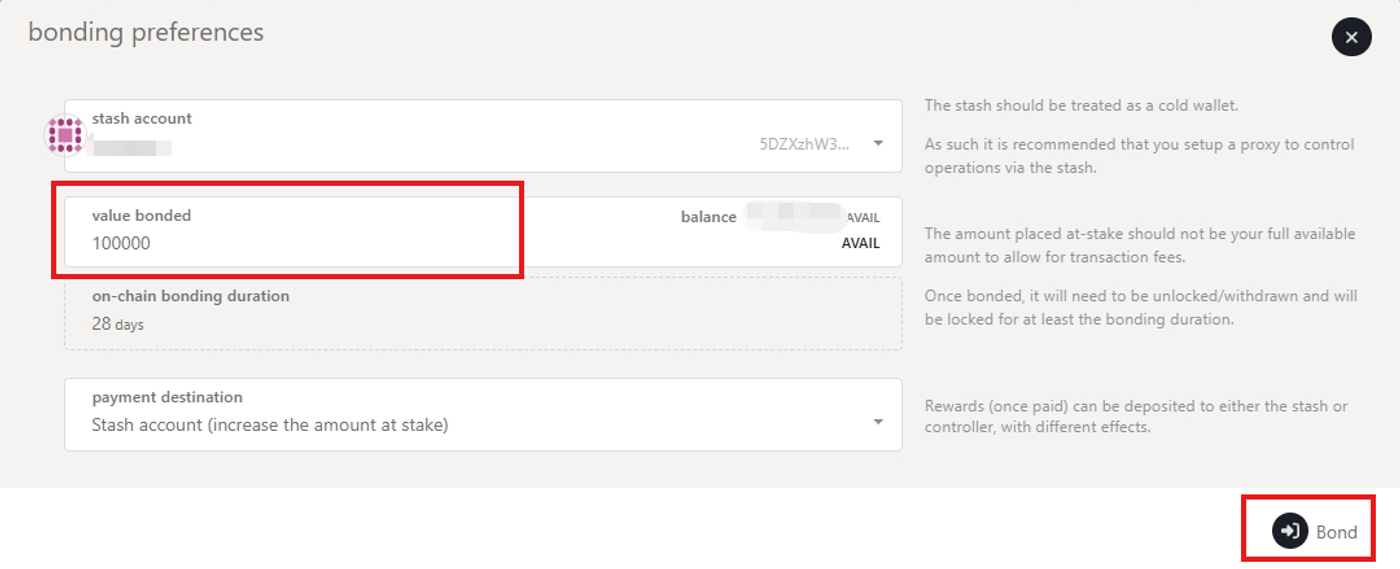
Minimum bonding for joining mainnet is 50K AVL
  1. Click on Session Key and enter the hex-encoded result. (Input your session keys that I mention to saved before)

  2. Click Set Session Key -> Sign and Submitand enter your password when prompted.

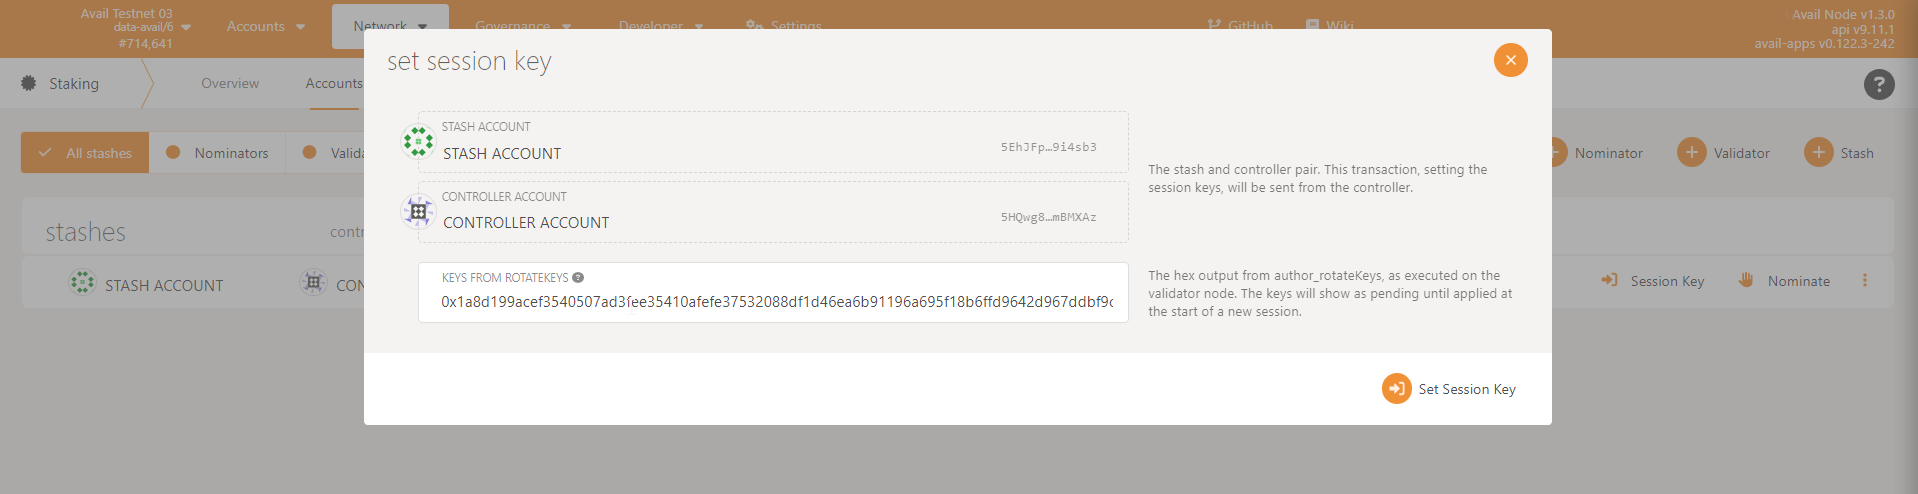
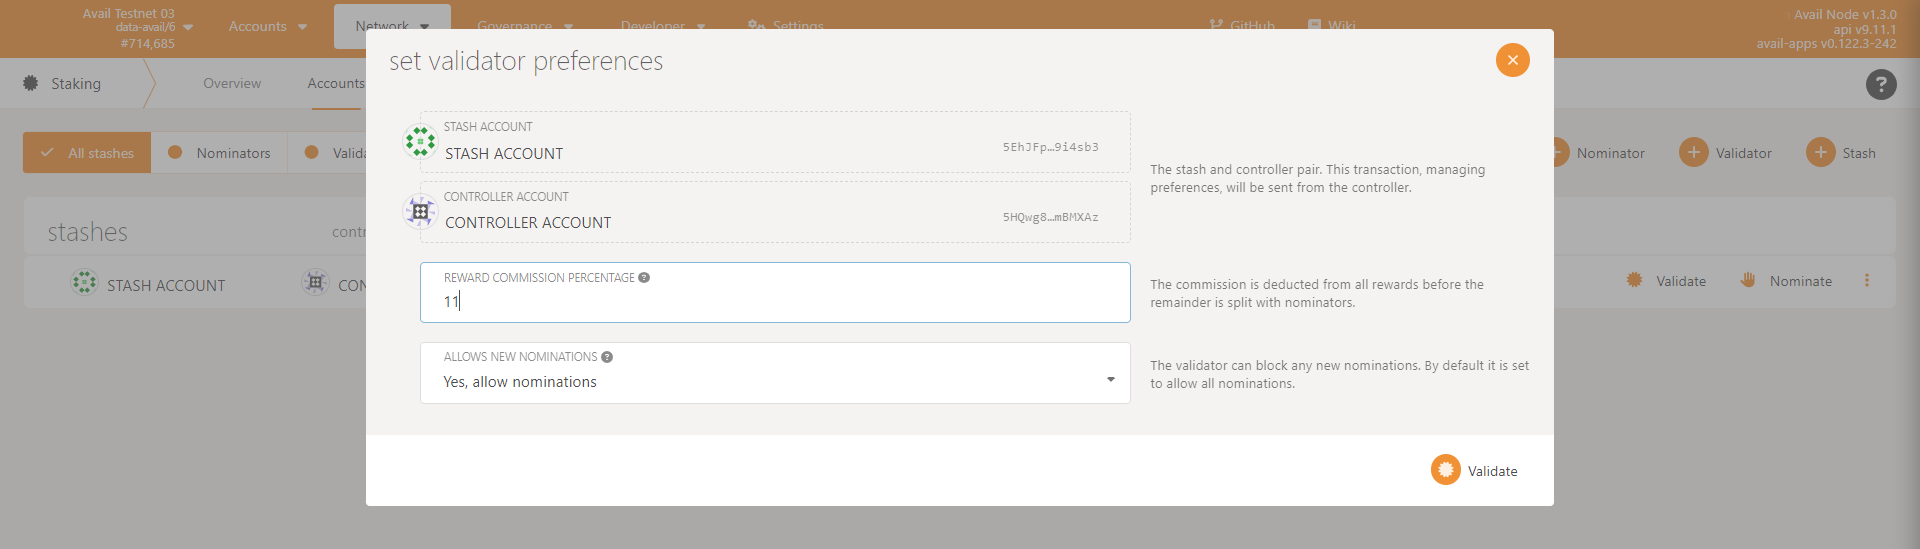
After submitting the extrinsic, you'll observe that Set Session Key changes to Validate. Make sure your node is fully synchronized before proceeding further.
  1. Click Validate on the Staking tab.

  1. Set your validator commission percentage.

  2. Enter your password and click Validate.

CONGRATULATIONS !!!

Your validator is now prepared to begin the validation process. If you wish to discontinue, you can click the stop icon. Please note that the Avail interface doesn't automatically verify if your node is synchronized; you'll need to confirm this manually. If your node has sufficient stake, the Avail blockchain will likely select it in the next epoch or two.

Last updated

Was this helpful?